📡 Receiving Point Clouds from Velodyne LiDAR with MSight
MSight offers built‑in support for Velodyne LiDAR sensors, enabling real‑time point cloud streaming, visualization, and storage directly on an edge device. This tutorial guides you through the steps to:
- Receive point cloud data using MSight
- Visualize the point cloud
- Save data locally for analysis
The example below uses a Velodyne VLP‑32C, but other models from Velodyne are also supported by MSight.
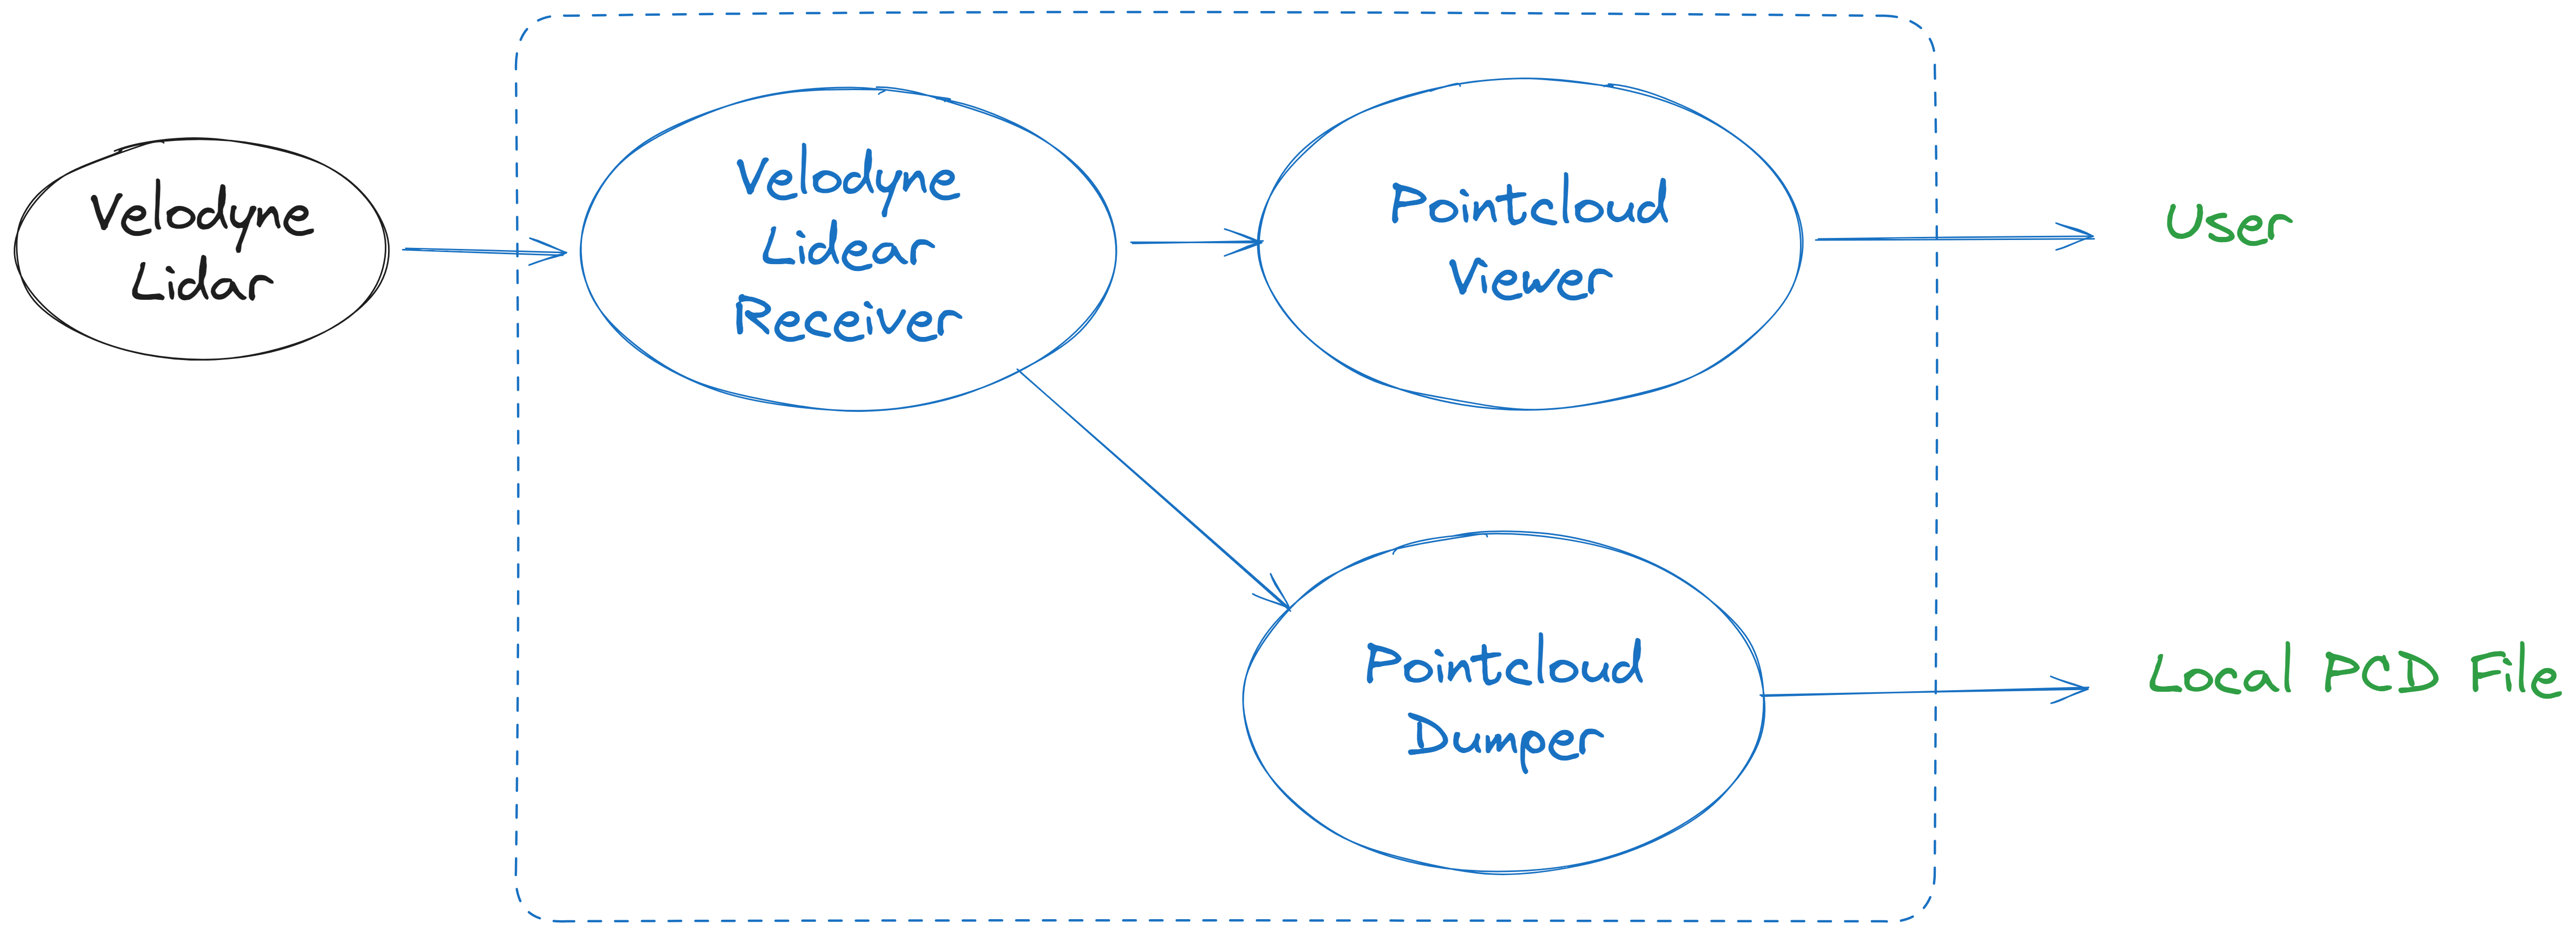
In this tutorial, we will setup a receiving node to receive pointcloud data from the lidar, a viewer node to view the pointcloud data, and a local dumper to dump pointcloud to local, as shown in this image:
📌 Prerequisites
Before starting, you will need:
- A Velodyne LiDAR device (e.g., VLP‑32C)
- A networked MSight edge device (same LAN as LiDAR)
- Correct data/telemetry port configuration, the default setting of Velodyne lidar is:
| Function | Default Port | Notes |
|---|---|---|
| LiDAR UDP data stream | 2368 |
Contains point cloud packets |
| Telemetry info | 8308 |
Contains sensor status + calibration |
If you configure the LiDAR to use different ports, adjust the command parameters accordingly.
Ensure the LiDAR is properly configured to send UDP packets to the edge device's IP address.
🚀 Step 1 — Launch the LiDAR Receiver Node
This node listens for UDP packets and converts them into MSight point cloud messages.
Run:
msight_launch_velodyne_lidar \
  --port 2368 \
  --telemetry-port 8308 \
  -pt lidar-topic \
  -n msight-lidar-1 \
  --sensor-name velodyne_1 \
  --model-id VLP32C
🔍 What do these parameters mean?
| Argument | Meaning |
|---|---|
--port |
UDP input port for point cloud packets |
--telemetry-port |
UDP port for LiDAR calibration + health info |
-pt lidar-topic |
Publishes decoded point cloud into topic lidar-topic |
-n msight-lidar-1 |
Node name (unique identifier) |
--sensor-name velodyne_1 |
Sensor identifier (used for filtering downstream) |
--model-id VLP32C |
Selects Velodyne model for packet decoding |
Tip
You can run msight_launch_velodyne_lidar --help to view the full list of supported Velodyne model IDs. Use --model-id YOUR_MODEL_ID to match your specific LiDAR device.
✔️ If everything is working, MSight will start receiving and decoding point clouds.
👀 Step 2 — Visualize the Point Cloud
To verify that receiver node is running properly, you can open a 3D viewer node that subscribes to the published LiDAR data:
msight_launch_pointcloud_viewer \
  -n pcviewer \
  -st lidar-topic \
  --filter-sensor-name velodyne_1
This node:
- Subscribes to topic
lidar-topic - Filters only point clouds from sensor
velodyne_1 - Displays a live viewer window for real‑time monitoring
Useful for sensor testing, calibration validation, and field deployment checks.
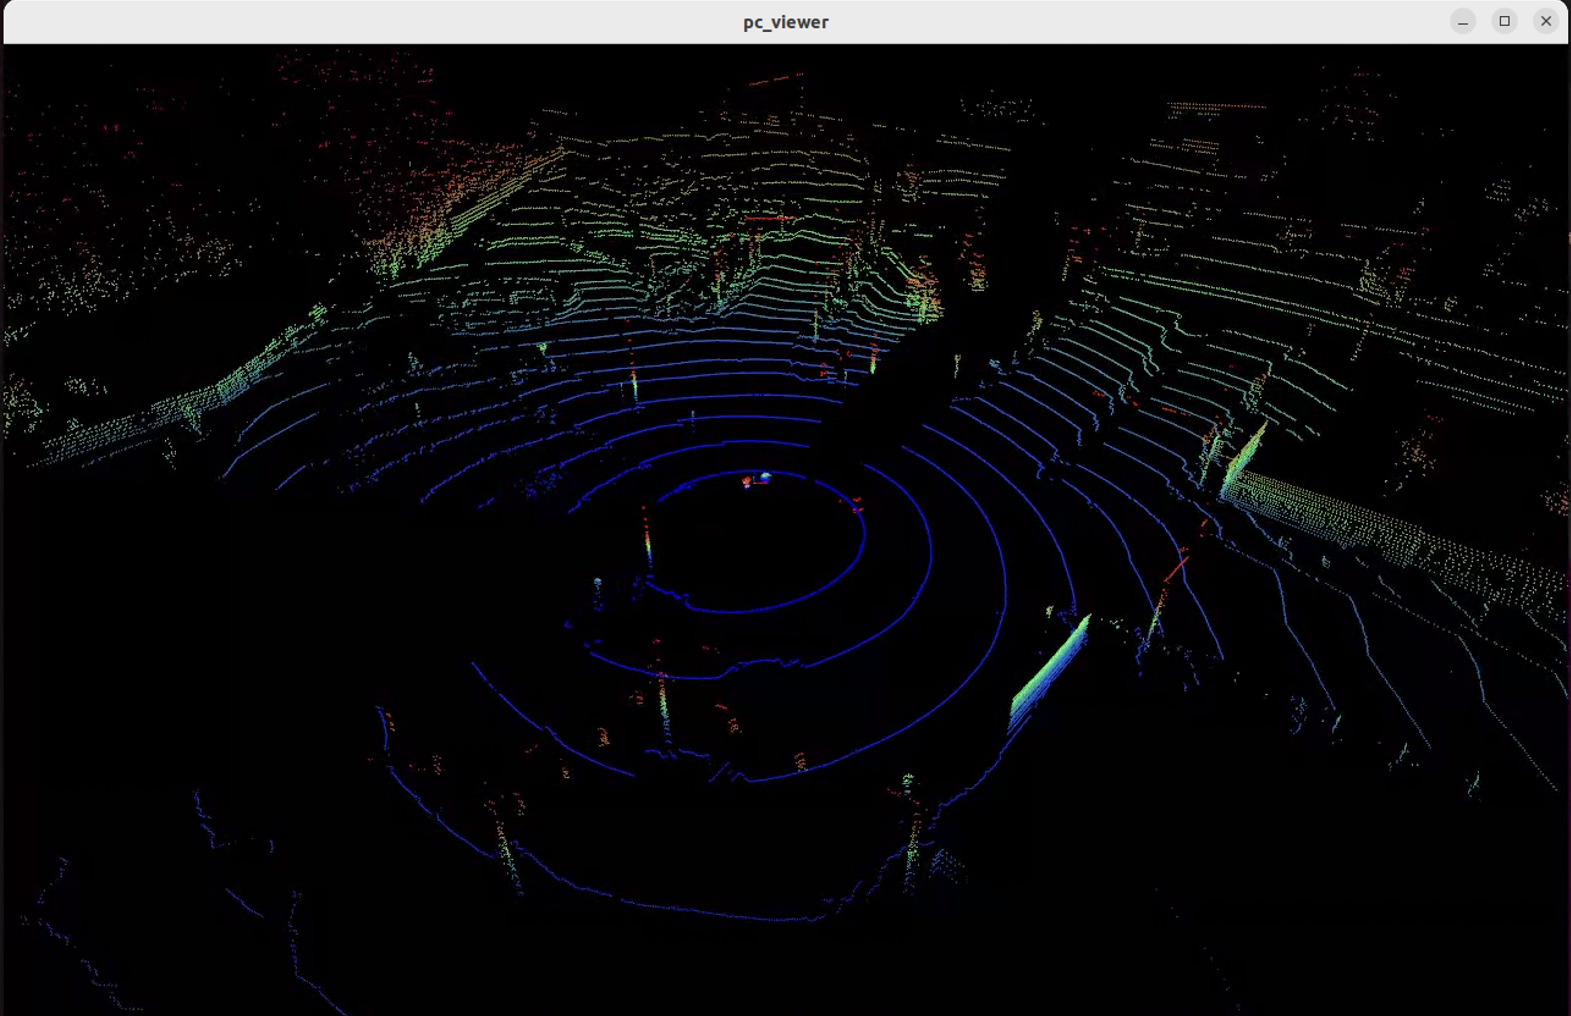
You should see a 3D visualization window pop up showing the live point cloud data from the Velodyne LiDAR as shown below:
💾 Step 3 — Save Point Clouds Locally
You can record the streamed data for offline processing:
msight_launch_pointcloud_local_dumper \
  -st lidar-topic \
  --output-folder-path /your/path \
  --name pc_dumper
This node:
- Listens for point clouds on topic
lidar-topic - Saves each frame into
.pcdfiles - Organizes results by timestamp
Replace
/your/pathwith any writable directory on your edge system.
🧠 Summary
Running these three nodes forms a complete LiDAR data flow:
Velodyne LiDAR → Receiver Node → Viewer / Dumper → Local / Cloud Analytics
This workflow enables:
- Real‑time perception debugging
- Dataset creation
- Easy integration into advanced MSight pipelines